Difference between revisions of "ServerSetup"
(→Setting up Lobby, World and Map Servers) |
|||
| Line 1: | Line 1: | ||
| + | [[Project_Meteor_Setup|Return to Project Meteor Setup]] | ||
== Server Setup == | == Server Setup == | ||
| Line 76: | Line 77: | ||
: 3. Run the map server: '''<Project Meteor source location>\Map Server\bin\(Debug\Release)\Map Server.exe''' | : 3. Run the map server: '''<Project Meteor source location>\Map Server\bin\(Debug\Release)\Map Server.exe''' | ||
: 4. Run the map server: '''<Project Meteor source location>\World Server\bin\(Debug\Release)\World Server.exe''' | : 4. Run the map server: '''<Project Meteor source location>\World Server\bin\(Debug\Release)\World Server.exe''' | ||
| + | |||
| + | [[Project_Meteor_Setup|Return to Project Meteor Setup]] | ||
Revision as of 03:54, 25 March 2021
Return to Project Meteor Setup
Contents
Server Setup
If you already have your own webserver with php support and a mysql 5.6 or 5.7 server, you can skip installing WAMP.
Installing WAMP
- 1. Download and install WAMP
- 2. Start the server by clicking on the WampServer64 icon created by the installer
- 3. Verify all services are properly started by checking on the W Icon in the notification bar:
- Green: All services started properly
- Yellow: Some services started properly
- Red: All services have stopped
Note: Start/restart/stop the WAMP server by clicking on the W icon and selecting Start/Stop/Restart All Services
Setting Up the Database
Importing with HeidiSQL
- 1. Confirm all services are installed and started
- 2. Download, install, and run HeidiSQL
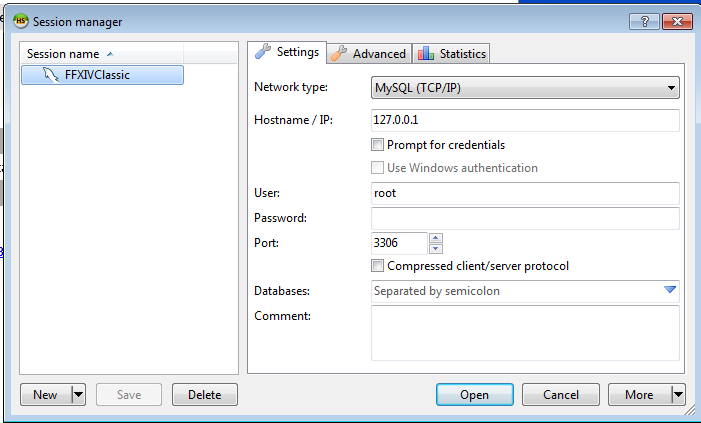
- 3. Select the New button to create a new connection and select Open Note: If the SQL server IP/username/password differ from the defaults, change them here, otherwise continue to the next step

- 4. Verify you are connected: A newly set up/blank mysql server should have the following databases listed:
Default tables information_schema mysql performance_schema sys
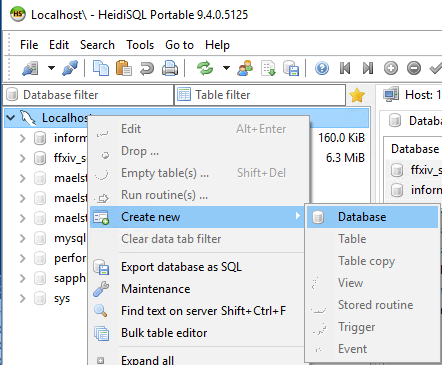
- 5. Right Click Unnamed and go to Create new → Database and name the new database: ffxiv_server Note: If you changed the name of the server in step 3, the name will be that instead of Unnamed

- 6. Click the new ffxiv_server database entry
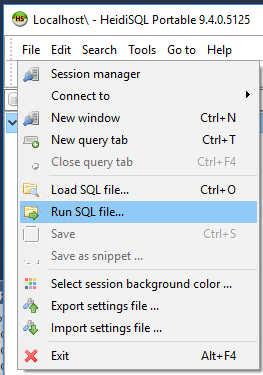
- 7. Go to File → Run SQL File and navigate to the <Project Meteor source code location>\sql\ folder

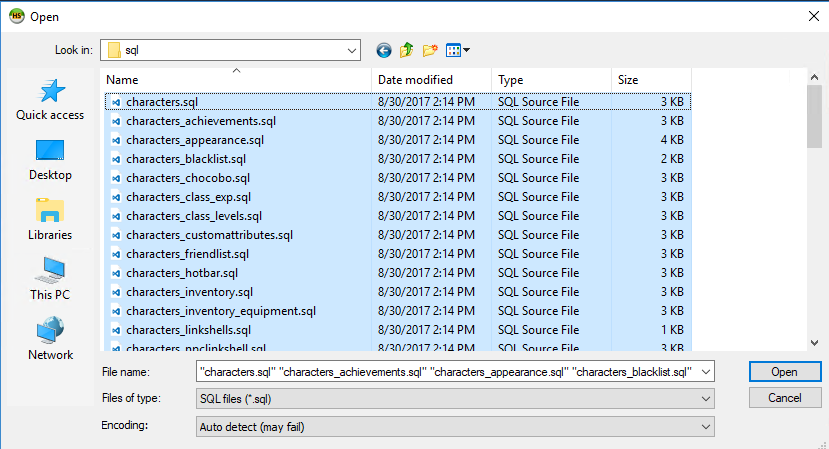
- 8. Select all SQL files in the folder, and execute them. Note: HeidiSQL may warn you about mixed linebreaks, or an empty warning prompt after executing the query. Ignore them, it'll still run the query successfully.

Importing from command line
- 1. Open the <Project Meteor source location>\sql\import.bat file for editing.
- 2. Adjust the following lines to your local environment or WAMP installation.
SET PATH_MYSQL="C:\path\to\mysql.exe"
SET PATH_MYSQLADMIN="C:\path\to\mysqladmin.exe"
SET PATH_SQL="<Project Meteor source location>\sql"

SET USER=root
SET PASSWORD=
SET DBADDRESS=localhost
SET DBPORT=3306
SET DBNAME=ffxiv_server
- The default mysql path for WAMP is C:\wamp64\bin\mysql
- The default WAMP credentials are already in place, as there is no root password.
Setting Up the Login Server
- 1. Confirm all WAMP services are running
- 2. Navigate to the location of the server source code
- 3. Copy the contents of the <Project Meteor source location>\www folder to the WAMP install location
- The default location is: C:\wamp64\www
- 4. OPTIONAL: If you have modified the database login settings, change them at:
- <web server www folder>\login_su\config.php
- 5. Restart the WAMP services
Setting up Lobby, World and Map Servers
- OPTIONAL: If the server and client are on different machines, edit the server IPs in the following locations <Project Meteor source location>\data\(lobby/map/world)_config.ini <SQL database>\ffxiv_server\servers <SQL database>\ffxiv_server\server_zones *if the map servers are not on the same server as world server
- Copy lobby_config.ini from <Project Meteor source location>/data/
- to <Project Meteor source location>\Lobby Server\bin\(Debug\Release)\
- Copy map_config.ini, staticactors.bin and the scripts folder from <Project Meteor source location>/data/
- to <Project Meteor source location>\Map Server\bin\(Debug\Release)\
- Copy world_config.ini from <Project Meteor source location>/data/
- to <Project Meteor source location>\World Server\bin\(Debug\Release)\
Alternatively, download the postbuild_copy.bat file and place it into your Data folder. It will attempt to copy all required files to their default build locations.
Starting the servers
- 1. Confirm all WAMP/web services are running
- 2. Run the lobby server: <Project Meteor source location>\Lobby Server\bin\(Debug\Release)\Lobby Server.exe
- 3. Run the map server: <Project Meteor source location>\Map Server\bin\(Debug\Release)\Map Server.exe
- 4. Run the map server: <Project Meteor source location>\World Server\bin\(Debug\Release)\World Server.exe